Adjusting the Cables on the Renegade Hoof Boot
Step-By-Step Adjusting Instructional Video:
In-Depth Details of Dialing in Cable Length Adjustments:
For information on how to change out a cable, see the Cable Replacing page.
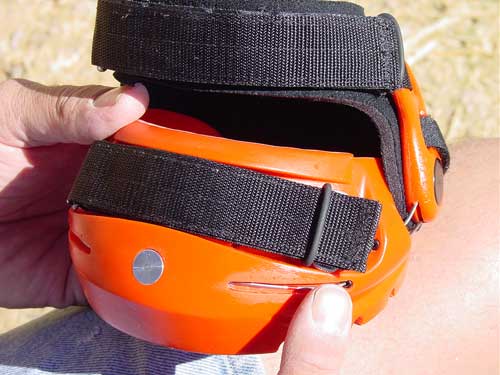
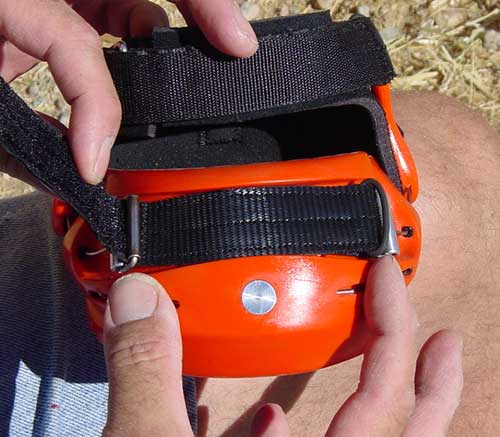
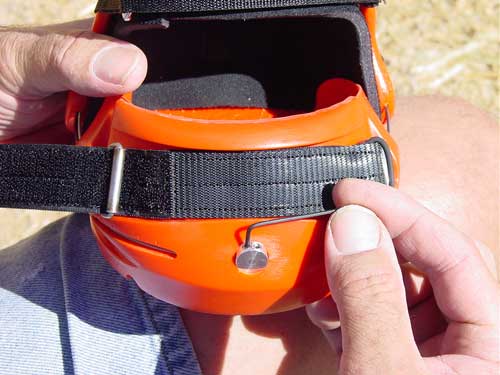
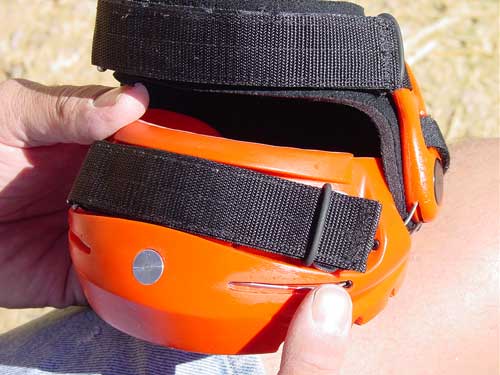
When the boot is installed upon the hoof, and with the toe strap properly tensioned as explained on the Installing the Boot page, the preferred amount of strap extending past the black rubber keeper loop is from 1/2″ -3/4″ .
If the strap extends less than 1/2″, then the strap is prone to being pulled loose when riding in deep footing or heavy brush.
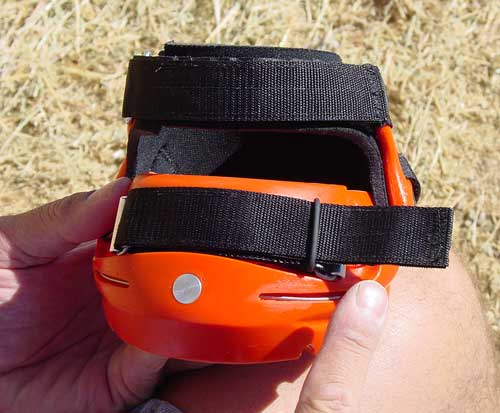
If the strap extends past the loop more than 3/4″, the contact surface area of the gripping portion of the strap will be reduced. This can lead to a reduction in the holding power of the strap.
Additionally, make sure that when you initially tighten the strap, you are doing so based on feel and not on any goal as to where you want the end of the strap to be. In other words, don’t pull the strap extra tight or make it extra loose in order to comply with the recommended end position specifications.
The strap will end up where the strap ends up based solely on the amount of force you use to tension it as described in the Installation page. If the strap end-position is then out of parameter, proceed with the cable adjustment sequence below.
1. Begin by unfastening the tension strap
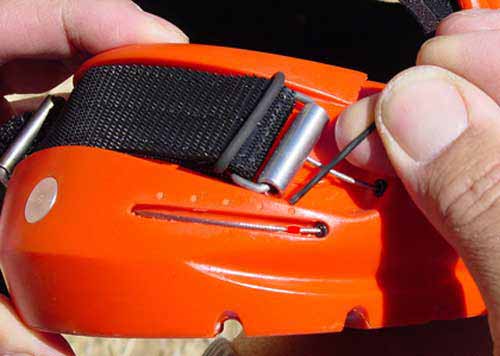
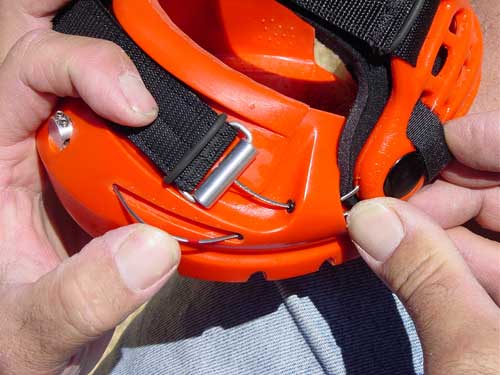
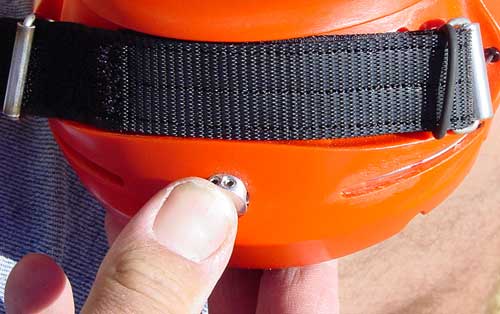
2. Notice the marker dimples on the boot and the red dot on the cable. These will be your reference marks for making the adjustment.
Moving the cable toward the cable clamp will effectively shorten the cable setting and reduce the amount of strap end length.
Note that the Classic boot model is pictured. The Viper® model will not have these reference marks on the boot shell — use the triangular window
and a rough “eyeball” measurement to gauge cable evenness.
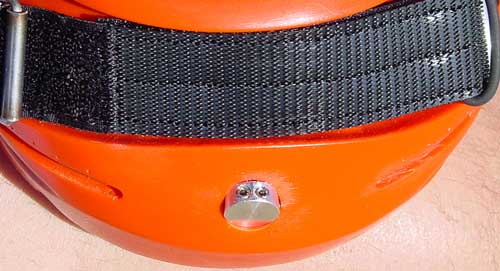
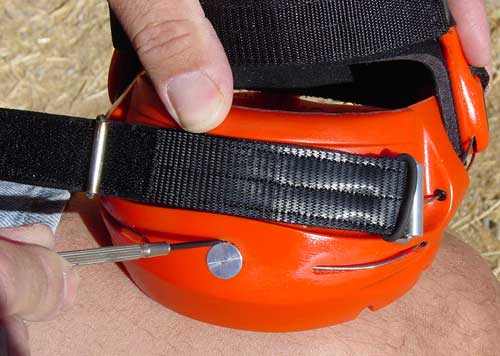 3. Using a small flat screwdriver, pry out the cable clamp just enough to expose the top edge (shown below).
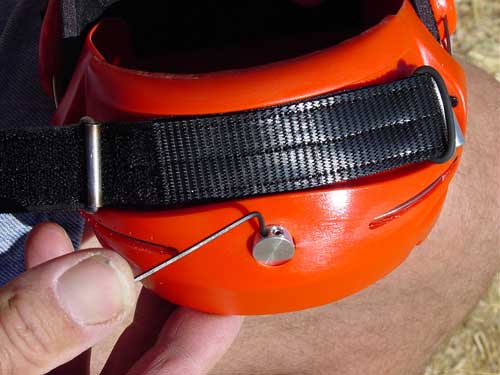
On all boots after 2012, the cable clamp has a small hole in the front. Insert the hex wrench into the hole and use it as a
lever point to rotate the clamp outward from the boot, exposing the set screws.
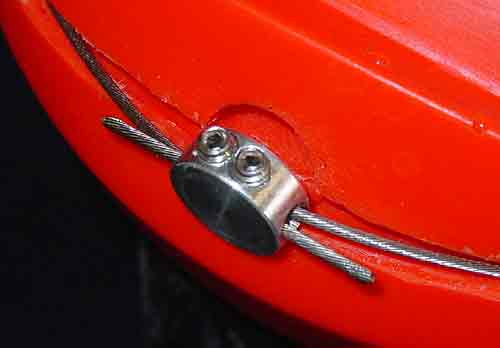
4. Now you have access to the two set screws which are responsible for locking the cables into position.
Do not rotate the cable clamp outward any further than needed to expose the set screws.
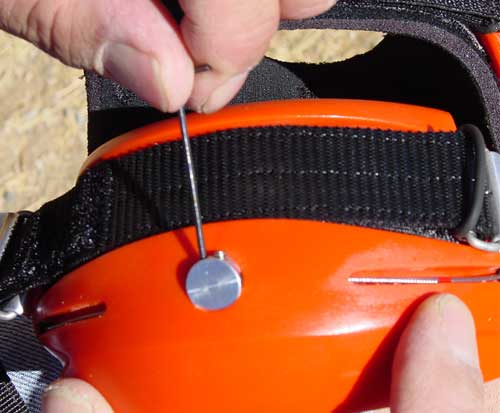
5. Using a 1/16″ hex wrench, back the set-screws out about 2-1/2 full turns, which in most cases is sufficient to release the cable for adjustment.
6. The cables are now loose and free to move.
Be careful to not pull them out. If you accidentally pull the cables out, review the Cable Change Page to replace them.
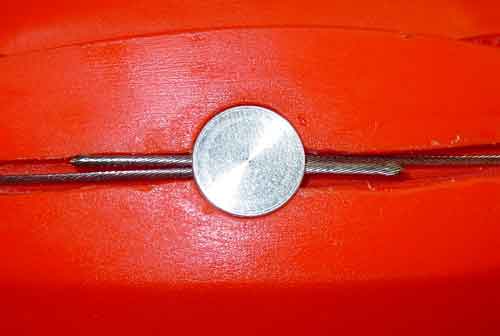
7. For the sake of clarity, part of the boot material has been but away to expose the hidden cable pathways and the cable ends.
Visible are the two individual cables (one from the left side and one from the right side) which overlap each other at the cable clamp.
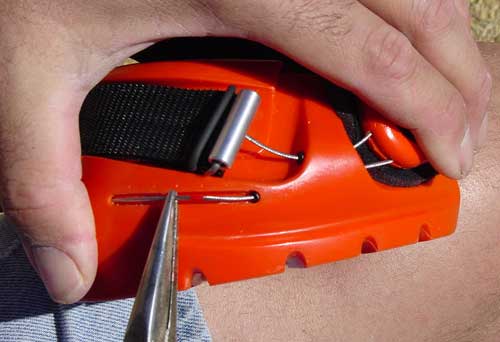
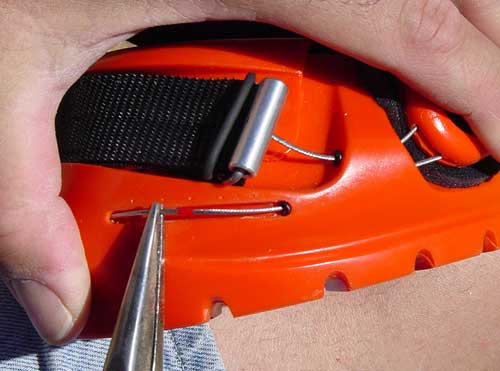
In order to shorten the effective length of each cable, you will be resetting the end of each cable by pushing the end further through the cable clamp. Another view is shown below.
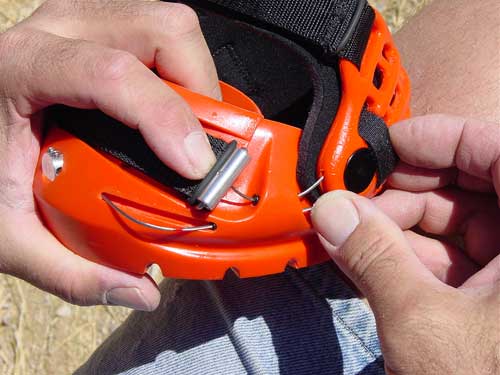
8. There are two methods for moving the cables. One method is to push an outward bulging loop in the cable.
9. Then press inward on the loop, which will cause the end of the cable to move on through the cable clamp.
10. An alternative method is to use needle nose pliers or hemostats for moving the cable.
Be careful not to use too much pressure or force, as this may damage the cable.
11. Adjust as necessary and repeat for the other side.
In most cases, the cable will only need to be moved one or two marks.
If you need to move the cable three marks or more, this is an indication that you may need a different size boot.
Should you have trouble moving the cables as demonstrated above, remove the set-screws entirely and push the cable clamp back into its home position.
This will allow the cables to have their maximum looseness, so be extra careful not to pull the cables out.
If you accidentally pull the cables out, review the Cable Change Page.
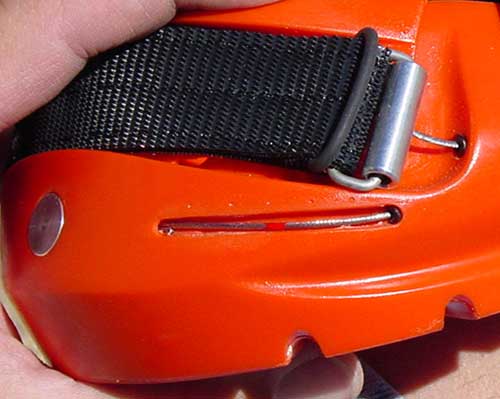
12. Now re-tighten the cables, but do this by tightening one screw a little bit then the other screw a little bit, back and forth a few times.
By doing this, you will seat the cables under the screws more evenly than just cranking them down in one step.
Make sure to snug the set screws down tight so that adequate pressure is put on the cables. This is what holds the cables in place.
If cables are slipping loose after adjustment, the set screws were not sufficiently tightened.
13. Push the cable clamp back into its home position.
14. You are now finished with the cable adjustment.
Put the boot back on your horse and check the new strap position.

